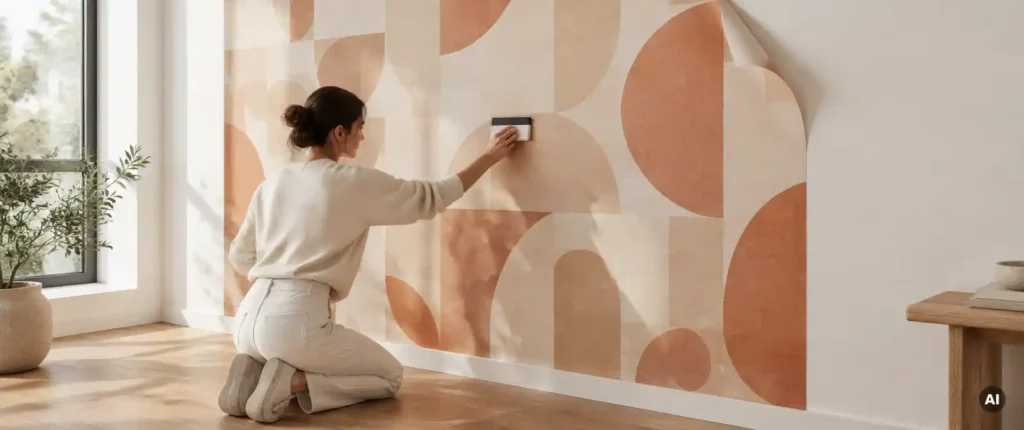
Air bubbles are among the most common reasons for complaints during processing. self-adhesive films. They look unsightly, reduce grip and are particularly noticeable on large surfaces. The good news: With proper preparation, the right technique and a little patience, air bubbles can be avoided in most cases from the very beginning.
In this guide, we go through the entire process step by step, from planning to application and post-treatment. The procedure applies to self-adhesive films as well as for self-adhesive wallpaper.
Prepare the substrate and plan the adhesive application
A clean, dry and stable substrate prevents most problems before they arise. Dust, grease or moisture create areas where the adhesive does not adhere, and that is where air later collects. Room conditions also play a role: most adhesives work best at room and material temperatures between about 15 and 25 degrees Celsius. For exact values, please refer to the technical data sheet of the film.
Do the following:
- Clean the Underground thoroughly, for example with a lint-free cloth and a suitable cleaner, and let it dry completely.
- Remove loose paint, dust, and residues. Sand down holes and uneven areas and smooth them out.
- Store the film and substrate in the processing area for at least a few hours before processing, so that both can acclimatize.
- Plan the path of the tracks and overlaps in advance. Mark the starting line with a ruler or laser.
To conclude, use your flat hand to check that the surface is smooth, dust-free, and dry. If you have any doubts here, it’s worth trying a test patch on an inconspicuous area. Special rules apply to textured surfaces; we cover these in the section on rough surfaces describe.
Apply the foil with the correct curling technique
The raking technique determines whether the air escapes outwards under control or is trapped under the foil. The principle is that you always work from a fixed point towards the edge and in doing so push the air forward.
- Simply remove about 10 to 15 centimeters of the carrier film and position the film with light tension at the starting line.
- Place the comb in the center and pull it outward with firm pressure. The comb should be at an angle of about 45 degrees.
- Step by step, pull off the carrier film while rubbing it from the center to the edges. Keep the film slightly apart from the substrate while rubbing it, until the roller presses it down.
- Overlap each rail by about a third so that no air inclusions remain between the tracks.
Use a comb with a felt edge to avoid scratches on the printed surface. After each pass, briefly check the surface against the light: If the surface appears smooth and without waves, you have done a good job.
Use wet bonding for large areas
For large areas or if you want to correct the position further, wet bonding is a proven method. A thin liquid film prevents the adhesive from immediately adhering. You can move the film, and the air can be squeezed out with the spatula and the liquid.
Important note: Not all films are suitable for wet bonding. Check the technical data sheet to see if the manufacturer allows this method. For films with instant adhesive strength or certain types of wallpaper, moisture can cause problems.
- Mix water with a few drops of mild detergent in a spray bottle.
- Spray the base and adhesive side of the film evenly, but not dripping wet.
- Position the film and adjust its orientation.
- Scrape the liquid out from the center outwards until no more water remains visible.
Allow the surface to rest for a sufficient time after applying the adhesive. The liquid must completely evaporate before the adhesive can form its full bond. Check after a few hours to see if any water bubbles have formed; these usually disappear on their own.
Pay attention to the pressure, drying, and storage of the film
Not every air bubble is created during the bonding process. Precursors such as pressure and storage also influence the result. Freshly printed films release residual solvents during premature processing, which can be visible as air bubbles under the film. This mainly affects solvent and eco-solvent prints with high color coverage.
- Allow printed films to release gas before laminating or gluing. The required time depends on the ink, the amount of paint applied, and the room climate; it is often at least 24 hours.
- Store the rolls lying down or hanging, never on the edge, and protect them from moisture and strong temperature fluctuations.
- Roll the printed films loosely and with the printed side facing outwards or according to the manufacturer's instructions, so that no pressure is applied to the material.
- Process the film as soon as possible and within the recommended storage period.
By observing these points, you can significantly reduce the risk of future blistering. A look at the data sheet for your material and ink will provide the specific values.
Correctly repair existing air bubbles
If air bubbles have formed despite careful work, you do not need to remove the film. The procedure depends on the size of the bubble.
Small blisters up to about one centimeter in size
Insert the bubble with a fine needle or the tip of a scalpel at the edge. Press the air out with your finger or a cloth towards the puncture point and then smooth the area with the spatula.
Larger bubbles and wrinkles
Gently peel off the film until just behind the affected area, while the adhesive is not yet completely cured. Reapply and smooth it from the center outwards. For stubborn areas, a gentle heat from the hairdryer can help the film become more flexible. Be careful not to overheat the material.
The place should then be smooth and no longer show any tension. If you need to completely replace a foil, the post explains how to do it. Remove without residue can.
Getting to blameless results with com2C
The right technique is one thing, the material is another. As a manufacturer, we develop com2C Printing media that can be reliably processed in practice. With our own chemical laboratory for inkjet coatings, we tailor properties specifically to your requirements. This also applies to applications where standard materials reach their limits.
That is what we specifically offer you:
- Advice on material selection for your substrate and printing process, whether solvent, latex, UV or water-based
- Technical data sheets with information on processing and bonding, so you know which method is suitable for your material
- Quick support when questions or problems arise during a project
- Development of individual solutions for special requirements
- Products like ours self-adhesive PVC-free wallpaper, which offers reliable processing for your wall design projects
Our PVC-free materials from the GoGreener line offer you a resource-saving alternative without having to compromise on processing and image quality. If you are planning a project or want to solve a specific processing problem, feel free to contact us. We support you with our experience from over 20 years in large format printing.