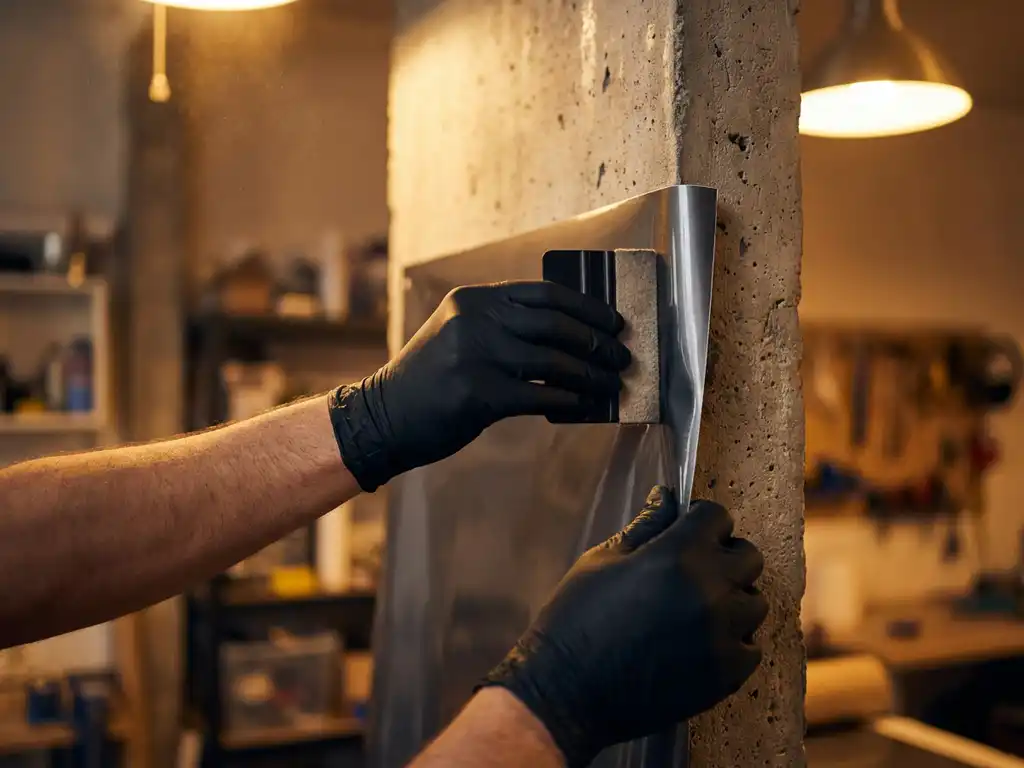
Self-adhesive films can be applied to rough or textured surfaces if you choose the right type of film and carefully prepare the substrate. The adhesion depends directly on how well the adhesive layer can contact the surface. The following sections show you what is important in terms of preparation, material selection, and processing.
Which substrates are considered rough or structured?
All surfaces that do not form a smooth, flat surface are considered rough or textured. These include tiles with grout, roughly plastered walls, textured wallpaper, concrete surfaces, wood with visible graining, and brick walls. What matters is not only the roughness itself, but also the depth and regularity of the texture.
In practice, two types are roughly distinguished:
- Lightly structured substrates: Peat moss, silky matte wall paint, slightly roughened surfaces. A suitable film with proper preparation adheres reliably here.
- Stably structured substrates: Rough cork wallpaper, deep tile joints, concrete with a structural pattern, untreated plaster. These surfaces place significantly higher demands on material and workmanship.
It is also important to consider whether the substrate is absorbent or not. Tiles and glass are not absorbent; however, plaster and drywall are. This influences the choice of adhesive and the pre-treatment.
Why does self-adhesive film perform worse on rough surfaces?
Self-adhesive film adheres poorly to rough surfaces because the adhesive layer only contacts the raised points of the surface. No adhesive bond forms in the recesses and gaps. The deeper and more irregular the structure, the smaller the actual contact area between the adhesive and the substrate.
Two additional factors come into play: First, dust and dirt that accumulate in the grooves can further reduce adhesion. Second, films tend to peel off at edges and transitions when the adhesive layer cannot form a continuous bond there. This problem is most common, especially on the edges and in tile joints.
Films with a very rigid backing foil add to the problem because they cannot adapt to the contour of the substrate. Softer, more flexible materials with pressure-sensitive adhesive seal out irregularities better.
Which film types are suitable for textured surfaces?
For structured surfaces, soft, flexible films with a pressure-sensitive acrylic adhesive and high initial adhesion are particularly suitable. Films with an air channel technology or special adhesive point systems that allow air to escape when pressed have proven particularly effective in creating a uniform adhesive surface.
Films with air channel technology
These films have a structured adhesive layer that forms small channels. When pressed, the trapped air escapes, and the adhesive surface increases in size. This makes them particularly suitable for substrates with light to medium-level structure, such as clay soil or smooth tiles.
Highly adhesive special films for rough surfaces
For highly structured surfaces such as rough plaster surfaces or concrete walls, films with a highly tacky, soft adhesive that can penetrate deeper into the surface structure are recommended. These materials are often thicker and less transparent, but offer significantly better long-term adhesion on problematic substrates.
In general, the rougher the substrate, the softer and stickier the film should be. Very thin films with weak adhesive are not suitable for textured surfaces.
How can you optimally prepare rough substrates for film bonding?
The preparation of the substrate is the most important step for a permanently adhesive film application on rough surfaces. Clean the surface thoroughly with a degreasing agent, dry it completely, and smooth out any severe irregularities as much as possible before applying the film.
Go through these in this order:
- Remove dust and dirt: Wipe the surface with a damp cloth. Pay special attention to any gaps and crevices where dust accumulates.
- Eliminate grease and soap residues: Use an isopropanol-based cleaner or spirit. This is especially important for kitchen and bathroom surfaces.
- Let it dry completely: Moist surfaces prevent reliable adhesion. Wait at least 30 minutes after cleaning.
- Check and smooth out unevenness: If the grout tips are sticking out too much or the tiles are chipped, you should sand or putty them before gluing them down.
- Use probation officers (if necessary): On very absorbent or problematic surfaces, a primer can significantly improve adhesion. It seals the surface and creates a uniform base for the adhesive.
The room temperature also plays a role. Ideally, process the films at temperatures between 15 and 25 degrees Celsius. Cold makes the adhesive stiff and significantly reduces the initial adhesion.
How do you apply self-adhesive film step by step on textured surfaces?
The most reliable way to apply self-adhesive film to textured surfaces is with the Nas technique or the Hinge method, combined with a felt scraper to ensure even pressure. Always work from the center outwards to avoid air bubbles.
Here's how to proceed:
- Cut the film: Cut the film to an excess of about 2 to 3 centimeters on all sides.
- Apply the Hinge method: Fix the film with masking tape in the center of the wall as a hinge. This way you can glue one side after the other without losing the position.
- Step-by-step removal of carrier film: Only remove the carrier film in small sections of about 10 to 15 centimeters, not all at once.
- With Filzrakel: Press the film firmly onto the substrate with a soft felt scraper. Do not use a hard rubber scraper, as it can damage the film on textured surfaces.
- Repairing gaps and recesses: Use the scraper to target tile joints and deep structures to press the film into place. A low-power hairdryer can soften the film and make pressing easier.
- Sealing edges: Press the edges particularly firmly. On edges and transitions, the film most often comes off first.
What to do if the film does not hold on rough surfaces or peels off?
When self-adhesive film peels off rough surfaces, it is usually due to insufficient preparation of the substrate, an unsuitable film type, or insufficient pressure during bonding. In many cases, you can improve the adhesion afterwards without having to completely re-glue the film.
First, check where and how the film is released:
- Replacement at the edges: Press the edge again with a comb and some heat from a hair dryer. If necessary, apply a drop of contact adhesive under the peeled edge.
- Bubbling over joints: Insert the bubble with a fine needle, squeeze the air out and carefully smooth the foil again.
- Large-scale replacement: In this case, the substrate likely wasn’t sufficiently cleaned or dried. Remove the film completely, prepare the substrate again, and apply fresh material.
If the film does not hold up despite good preparation, the material may not be suitable for this substrate type. In this case, switch to a film with stronger adhesive or apply a release agent before re-adhering.
Self-adhesive films for rough surfaces: com2C helps you choose the right material
Finding the right film for a structured substrate is not a matter of chance. It depends on the combination of adhesive system, film flexibility and substrate type. We develop and supply printing media that are specifically designed for such requirements.
- Our range includes self-adhesive films with different adhesive systems, tailored to smooth, slightly textured and highly textured substrates.
- We provide you with technically sound advice: Which film works on tiles, which on concrete? We answer these questions concretely, not in a general way.
- Our films are compatible with common large-format printers and are suitable for solvent, latex, and UV ink systems, allowing your printing service provider to get started right away.
- For special requirements, we quickly develop individual solutions because we have our own manufacturing facility and a chemical laboratory for inkjet coatings.
If you have a project with difficult ground conditions and are unsure which material is the best choice, take a look at our Interior design assortment at com2C or you can take it directly Contact. We help you make the right decision.