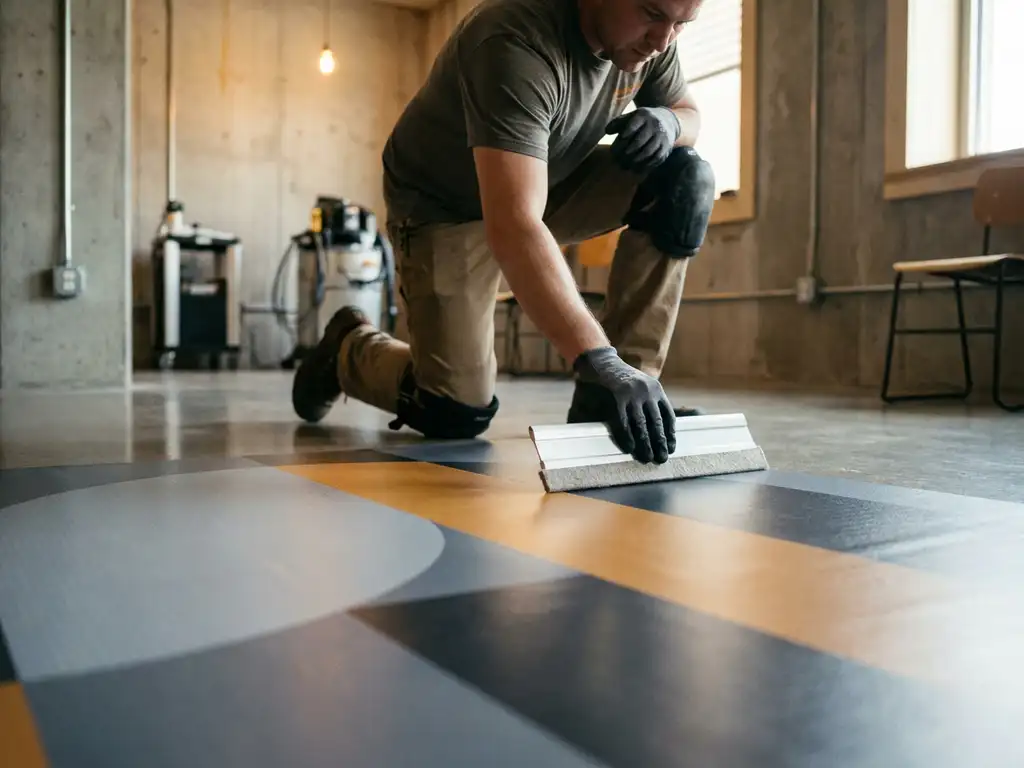
Large-format floor films can be applied without bubbles if you carefully prepare the substrate, apply the film gradually with a spatula, and work with an air channel technique when applying it. The biggest mistake is to apply the film at once without controlling the air flow to the outside. The following sections show you each step, from preparing the substrate to treating stubborn bubbles.
Why do air bubbles form when adhesive is applied to floor coverings?
Air bubbles form when adhesive is applied to the floor covering, because air is trapped between the adhesive layer and the substrate. This happens especially when the adhesive is applied too quickly or without proper pressure, when the substrate has unevenness or pores, or when the adhesive layer fully adheres before the air has had time to escape.
Another common trigger is temperature: With a substrate that is too cold, the adhesive layer becomes stiff and adheres unevenly. With surfaces that are too warm, such as from direct sunlight, the adhesive activates too quickly. Both extreme cases make controlled pressing considerably more difficult.
The material structure also plays a role. Self-adhesive floor films usually have a textured adhesive layer with so-called air channels that facilitate the escape of air during installation. If this structure is missing or damaged, the risk of blistering increases significantly.
What groundwork preparation is necessary before laying the floor foil?
Before applying a floor covering, the substrate must be clean, dry, level, and free of grease. Dust, moisture, oil, or old adhesive residues prevent even adhesion and are the most common cause of subsequent detachment or blistering. Thorough preparation is the most important step for a lasting result.
Follow the preparation in this order:
- Cleaning: Rinse thoroughly and wipe with a suitable cleaning agent to remove any excess moisture. Treat grease stains with isopropanol.
- Drying: Allow the underlay to dry completely, at least 30 to 60 minutes after the wet cleaning.
- Check for unevenness: Drive with a straight edge or your hand across the surface. Elevations of 1 mm or more can cause the film to curl.
- Smoothing out unevenness: Fill in small depressions with filler, sand down any bumps, then clean again.
- Check the temperature: The ground temperature should be between 15 and 30 degrees Celsius. Warm up the ground a little before planting, avoid direct sunlight.
Especially for tiles: the joints can be visible through the film if they are deeper than 1 mm. In this case, it is recommended to fill them with joint filler or a film with sufficient material thickness to mask the structures.
What tools are needed for a bubble-free floor foil?
For a bubble-free processing of ground sheets, you will need a scraper with a felt edge, a knife with a fresh blade, a measuring tape, a pencil or chalk marker, and a soft cloth or microfiber cloth. Optionally, a heat gun is helpful for treating stubborn bubbles.
The scraper is the most important tool. It presses the film evenly and pushes the air out in a controlled manner. Use only scrapers with a soft felt edge to avoid scratching the film surface. Hard plastic scrapers without a protective coating can damage the surface when applied to printed floor films.
For large areas, an extension rake or a ground auger are recommended, which allow you to work uprightly without constantly having to bend down. This significantly reduces errors due to uneven pressure.
How do you install a large-format floor film step by step?
Apply a large-format floor film without bubbles by positioning the film first, then gradually pushing it from one side while continuously guiding the air outwards with the squeegee. Never remove the entire protective film at once.
Here's how to proceed in concrete terms:
- Align the foil: Position and align the floor film with the protective backing on the surface. Mark the area with a measuring tape and a chalk marker.
- Fix the first edge: Start on a short side. Remove the protective film about 10 to 15 cm. Apply the film to the marking and press it outwards with the comb from the center.
- Proceed step by step: Peel off the protective film in 20 to 30 cm sections and immediately press the film down with the scraper. Always work from the center to the edges, never from one side to the other.
- Even pressure: Apply pressure firmly and evenly. Too little pressure will trap air, while too much pressure can stretch the film and create distortion.
- Pressing the edges: Press the edges and corners particularly carefully. This is where detachment most often occurs.
- Cut off excess: Cut cleanly along the wall or edge with a fresh cutting knife. Blunt blades tear the foil.
For very large areas, it is advisable to work in pairs: One person removes the protective film evenly, while the other immediately peels off the film. This way, you avoid the film from being applied in an uncontrolled manner.
What to do if bubbles still appear after the adhesive has dried?
Small air bubbles after gluing can usually be removed with a heat gun or a hair dryer, followed by pressing down. Heat softens the adhesive layer and makes the film more flexible, allowing the trapped air to escape more easily.
Do the following: Set the heat gun to a low to medium setting and heat the blister from the outside in. Then immediately press the blister outwards with your thumb or a curling iron from the center outwards. Do not heat for too long, as the foil may otherwise curl.
For stubborn bubbles that won’t let go with heat, you can carefully insert a very fine needle into the bubble, squeeze out the air, and then firmly press down on the spot. This injection is hardly noticeable on high-quality floor mats with a textured surface.
Blisters that have formed due to dirt or moisture under the film can usually not be repaired permanently. In this case, the affected area must be replaced, the underlying surface cleaned, and the film must be re-applied.
Which floor film is best suited for large-format applications?
Self-adhesive floor films with a textured air channel adhesive layer, sufficient material thickness of at least 200 micrometers, and a non-slip, durable surface are best suited for large-area applications. This combination facilitates bubble-free processing and ensures durability under load.
When choosing, pay attention to the following characteristics:
- Air duct adhesive layer: This allows air to escape during installation and significantly reduces the formation of bubbles.
- Material thickness: Thicker films hide irregularities better and are more resistant to mechanical stress.
- Non-slip surface: Important for safety, especially in public areas or when there is pedestrian traffic. Be sure to check for appropriate certifications such as R9 or higher.
- Print compatibility: For printed floor foils in large-format printing, the material must be compatible with the ink system used, whether solvent, latex or UV.
- Removable without residue: Especially relevant for rental apartments or temporary installations. Not all floor coverings can be removed without leaving any residue.
For private use in rental apartments, residue-removable variants are particularly convenient. They can be removed without damaging the subfloor, which saves considerable effort during removal or remodeling.
Floor films for your home: com2C helps you make the right choice
Anyone who wants to not only install a floor film but also have it individually printed needs a material that is both technically and visually convincing. We develop and supply floor films that are specifically designed for digital large-format printing and are also suitable for private living spaces.
- Floor films with a structured air channel adhesive layer for easy, bubble-free application
- Materials with a non-slip surface and sufficient strength for everyday use
- Compatibility with all common printing systems, including solvent, latex, and UV
- Precise color reproduction for individually printed motifs in a high-quality finish
- Removable variants without residue, ideal for rental apartments
Our com2C Interior Design Solutions They are aimed at printing service providers and advertising technicians who produce custom-made floor films for end customers. If you would like to know which material is best suited for your specific application, we are happy to assist you with a consultation. Consultation available.