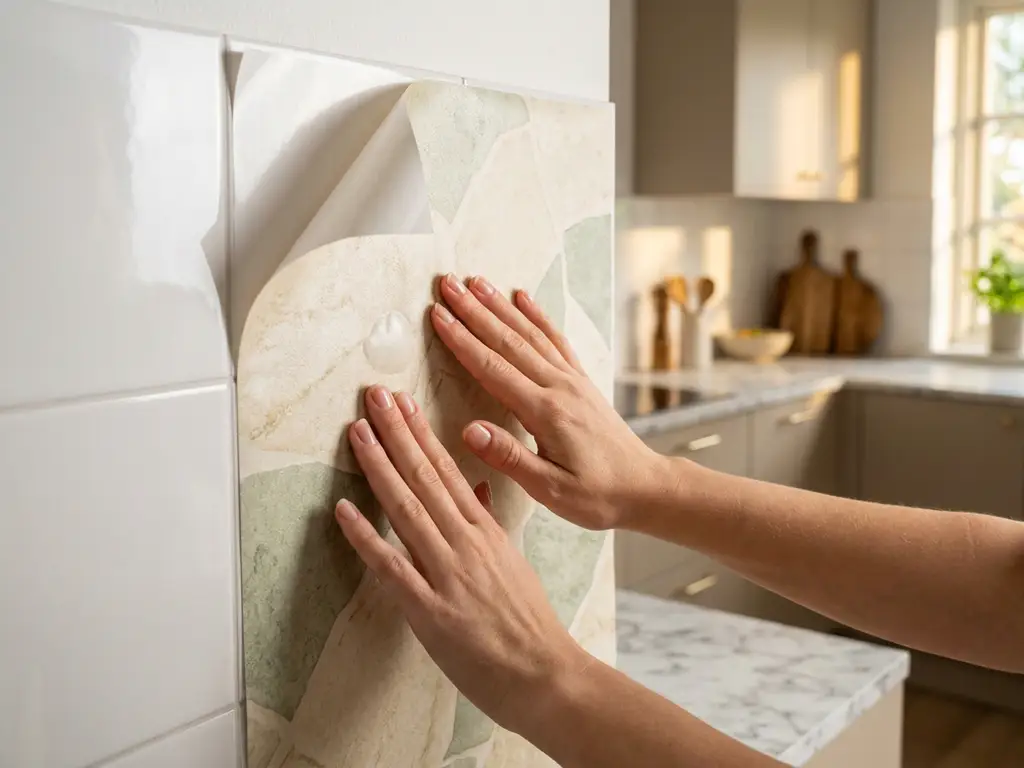
Self-adhesive kitchen back panels are properly applied by thoroughly cleaning and degreasing the wall, applying the film from top to bottom with a squeegee without bubbles, and carefully sanding away any loose edges. Preparing the surface is the most important step, as even the highest-quality film will not adhere permanently to a greasy or wet surface. The following sections go through all relevant questions regarding the application of a kitchen backsplash in a step-by-step manner.
Which surfaces are suitable for a self-adhesive kitchen backsplash?
Self-adhesive films adhere reliably to smooth, clean, and dry surfaces. Suitable surfaces include smooth tiles, painted walls, glass, wood panels with a smooth surface, and plastic panels. Strongly textured, porous, or freshly painted surfaces are not suitable, as the adhesive surface is too weak or the adhesion is too unstable.
The bonding works particularly well on ceramic tiles, which are common in kitchens anyway. The smooth glaze provides an ideal base for adhesion. Good results are also achieved on glass and smooth laminate panels. It is important that the surface has no loose spots, cracks, or peeling paint, because the film can only hold as well as the underlying surface itself.
Rough wall surfaces or highly textured wallpaper are problematic, however. The film does adhere to the elevations, but no contact with the adhesive is created in the recesses. This leads to delaminations in the long term, especially in the kitchen, where moisture and heat exert additional pressure on the adhesive bond.
How do you properly prepare the wall before applying the wallpaper?
The wall must be thoroughly cleaned, degreased and completely dry before applying the adhesive. Grease, dust or soap residues are the most common causes of poor adhesion. First, wipe the surface with a damp cloth, then with an eraser or isopropyl alcohol, and let the surface dry completely.
Degreasing is particularly important in the kitchen. Cooking oil splatters invisibly onto tiles and walls, even when the surface appears visually clean. A conventional household cleaner is not sufficient here. Use isopropyl alcohol (at least 70 percent), which reliably dissolves fats and evaporates without leaving residue.
Also pay attention to the room temperature. Self-adhesive films adhere best at temperatures between 15 and 25 degrees Celsius. If the wall is too cold, the adhesive becomes runny and adheres poorly. Wait at least 30 minutes after cleaning before starting the bonding process.
How do you apply the film without bubbles and straight?
To achieve a blister-free result, stick the film from one side to the other by peeling off the protective film gradually and pressing the film evenly outwards from the center with a hairdryer or a credit card. Start at the top and work your way down, so that air can escape downward.
Measure the area carefully before cutting and cut the film by a few centimeters. Mark the upper edge with a pencil or masking tape as a guide line. First, stick the film only to the top edge, without completely peeling off the protective film.
Then peel off the protective film in small sections of about 10 to 15 centimeters and immediately press the film with the scraper. Always work from the center outwards to push air to the side instead of trapping it. Small bubbles that form when pressing are often easily removed by vigorous rubbing with the scraper. Hard-core bubbles can be punctured with a fine needle and the air expelled.
How do you cut the foil around the sockets and corners?
The easiest way to cut out the power outlets is to first apply tape to the entire surface of the power outlet, then cut along the power outlet frame with a sharp cutting knife and remove the excess tape. For corners, cut the tape at the edge and neatly overlap the excess.
Before working, be sure to turn off the power outlet. If possible, remove the socket frame; this will allow you to work more cleanly and the foil will reach the base of the outlet directly. After the adhesive has dried, reassemble the frame to cover the cut edge cleanly.
For interior corners, cut the film so that it extends about two centimeters beyond the corner. Glue the film to the corner, fold the excess around it, and press it firmly against the adjacent wall. For exterior corners, it is recommended to cut the film at the edge and reattach the second side with a small overhang to keep the edge clean and smooth.
How long does a self-adhesive kitchen backsplash last, and can it be removed without leaving any residue?
A cleanly applied kitchen backsplash film reliably lasts for several years on suitable substrates. High-quality films can be removed without residue after use if you peel them off slowly and evenly; ideally, warm them slightly with a hair dryer. On smooth tiles, they usually leave no adhesive residue.
The actual durability depends on several factors: the quality of the film, the preparation of the substrate, and the conditions in the kitchen. High heat directly on the stove, prolonged moisture, or frequent wiping with aggressive cleaning agents can shorten the lifespan. Therefore, do not place the film directly over an open flame or induction stove without sufficient distance between the film and the surface.
For tenants, the absence of residue is particularly relevant. High-quality films with repositionable adhesive can still be removed cleanly after years without damaging the substrate. To remove the film, pull it slowly at a slight angle, not perpendicular, and heat stubborn areas with the hairdryer to about 40 degrees Celsius.
What to do if the film peels off or bubbles form?
When the film peels off, it almost always results from insufficient substrate preparation or too much moisture. Carefully remove the affected area, clean and degrease the surface again thoroughly, and after it has completely dried, reapply the film. To remove air bubbles, use a fine needle to pierce the film and squeeze out the air.
If edges or corners come loose, you can fix them with a small drop of spray adhesive or a special film adhesive. After that, press the edge firmly with the spatula and let the adhesive fully harden before exposing the surface to any more moisture.
Blisters that form after gluing often result from temperature fluctuations or trapped moisture. If you prick the blister at its thinnest point with a pin, squeeze the air out and rub the area with the scraper firmly. For larger detachments, it is advisable to replace the affected section completely, as repeatedly removed foil loses its adhesive strength.
Self-adhesive kitchen backsplashes from com2C: Quality that stands the test of time
We know from years of experience that a kitchen backsplash film is only as good as the material it is made from. That’s why we develop and produce our films with special attention to adhesion, moisture resistance, and easy handling – the very qualities that are required in the kitchen on a daily basis.
- Our films are specifically designed for wet and heat-stressed areas such as kitchens
- The adhesive adheres reliably to tiles, glass and smooth walls and can be removed without leaving any residue.
- We offer materials for individual digital printing, so print service providers can create custom-made designs with precise color reproduction.
- Our PVC-free materials from the GoGreener line are an alternative to PVC films without compromising on quality
- We advise you directly and together find the appropriate material for your specific application
If you want to install a kitchen backsplash that is technically reliable and visually appealing, you will find it at our Kitchen backsplash films the appropriate material. For specific questions regarding material selection, processing, or individual requirements, we are happy to assist you. contact us and we will help you further.