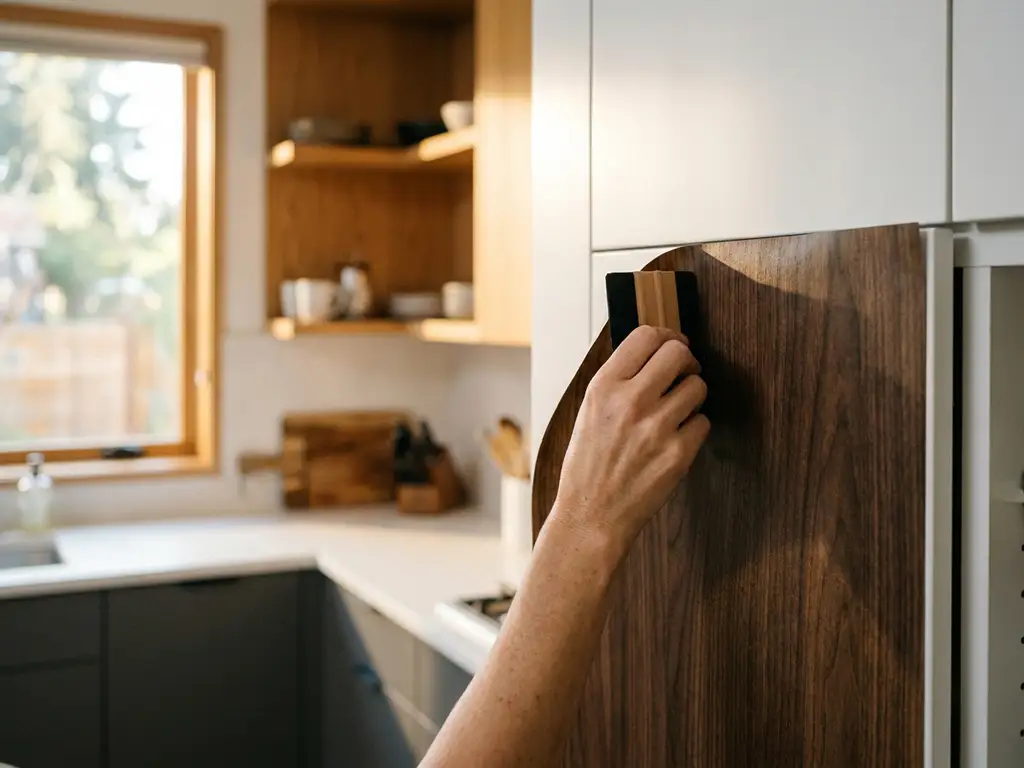
Outdated kitchen fronts don’t have to mean that you have to completely renovate your kitchen. With self-adhesive film, kitchen cabinets and fronts can be quickly, cost-effectively and without a need for a professional can be upgraded. The result looks professional, is easily removed without leaving any residue and is particularly suitable for rental properties.
In this guide, we show you step by step how to apply your kitchen fronts yourself, from preparation to final inspection. If you follow each step carefully, you will achieve a clean, bubble-free result that is truly impressive.
You need this before you glue the kitchen front together.
Before you start the actual taping, you need the right material and tools. The quality of the self-adhesive film plays an important role: cheap films quickly peel off at the edges, are difficult to handle, and leave adhesive residue when removed. Choose a film that is specifically designed for kitchen surfaces—that is, heat-resistant, moisture-resistant, and easily removed without leaving any residue.
The following should be prepared before you begin:
- Self-adhesive film in the desired color or finish (e.g., wood, concrete, uni)
- Tape measure or ruler
- Utility knife or scissors with a sharp blade
- Rakel or credit card for smoothing
- Fat-dissolving agent or isopropyl alcohol for cleaning
- Microfiber cloth
- Pencil or masking tape for marking
- Hair dryer (optional, for difficult edges)
Also, plan to add a little more film than you actually need. An overhang of five to ten centimeters per page gives you room to adjust and prevents you from having to start from scratch if you make a small mistake.
Prepare and measure the kitchen counter properly
A clean surface is the most important prerequisite for a lasting result. Grease, dust, or soap residues prevent the film from adhering properly. Clean each surface thoroughly with degreaser or isopropyl alcohol and allow the surface to dry completely before proceeding.
- If possible, remove the handles and hinge covers. This will allow you to guide the film cleanly to the edges.
- Clean the front surface with a lint-free cloth and degreaser. Wipe in circular motions and allow the surface to dry for at least ten minutes.
- Measure the height and width of each front individually. Even if your cabinets appear identical at first glance, measurements can vary slightly.
- Take measurements and add five to ten centimeters of excess on each side.
After cleaning with a hand brush, check to see if the surface is truly free of grease. If it feels slightly sticky or oily, clean the area again. On a clean, dry surface, the film adheres evenly and does not prematurely peel off at the edges.
Cut the film to size and apply it without bubbles
Cut the film to the measurements you have noted. Place the film on a smooth surface and cut along a metal rail with a sharp cutting knife. A blunt knife will tear the film and leave unsightly edges.
- Peel off the protective film on one short side about five centimeters and fold it, without touching the adhesive side.
- Position the foil on top of the front and align it straight. Use masking tape as a temporary holder if you are working alone.
- Smooth the exposed adhesive side with the spatula from the center outwards. Work in long, even strokes and avoid pressure towards the still covered film.
- Step by step, pull off the protective film and smooth the film down section by section. Never pull off the entire protective film at once.
- Small bubbles that form when applying the adhesive can be removed with a toothpick to the next open edge. Hard-to-remove bubbles can be punctured with a fine needle and the air is removed.
After the complete application, smooth the entire surface again with the spatula, this time with a little more pressure. The film should now be even and without visible waves or bubbles. Cut off the excess with the cutter knife cleanly, by guiding the blade closely along the edge.
Seal the edges and check the result
The edges are the weakest point when applying foil. This is where the foil starts to peel off first, especially in the kitchen, where humidity and temperature fluctuations act permanently. Take your time with this step; it determines the longevity of your result.
- Heat the edges of the film briefly with the hairdryer on a low setting. The heat makes the film flexible and improves the adhesion on the edge.
- Press the edges firmly with your fingernail or a curling iron. Pay special attention to corners and transitions to hinges or holes.
- Test all the edges by lightly rubbing against them. If a edge lifts, heat it again and press it again.
After sealing, take a step back and inspect the front with a light beam. This will allow you to detect any remaining bubbles, uneven areas, or edges that have not yet fully bonded. Correct these areas now, while the film is still fresh and easier to work with.
Common problems with foil wrapping and solutions
Even with good preparation, difficulties can arise when applying the kitchen fronts. Most of them can be solved if you know what to do.
Bubbles cannot be brushed out
If a blister persists despite scratching, there is usually air trapped underneath. Insert a thin needle into the blister at an inconspicuous spot and press the air out with your fingernail towards the puncture site. Then briefly heat the area with a hair dryer and smooth it out.
The film peels off at the edges
This often happens if the surface was not completely grease-free before applying the adhesive or if the film is not suitable for humid environments. Clean the affected edge again with isopropyl alcohol, let it dry, and press the film back together with heat. For permanent adhesion, you can additionally secure the edge with a transparent acrylic adhesive.
The film doesn't really align itself
Carefully peel off the film until it is completely pressed down. Most high-quality self-adhesive films can be corrected in the first few minutes after application without damaging the adhesive surface. Reorient the film and start applying it again from the center outwards.
Adhesive residues after removal
If you want to remove the film after a while, pull it off slowly and at a slight angle. Heat from a hair dryer makes it much easier to remove. Any remaining adhesive is removed with isopropyl alcohol or a special adhesive remover without damaging the surface.
Kitchen renovation with com2C: Materials that really work
The result when laminating depends on the quality of the material. We at com2C We develop and produce self-adhesive films that are specifically designed for demanding applications such as kitchen fronts. Our materials are used by printing service providers and advertising technology companies to produce custom-made, individually printed films that you can receive as finished products.
What our materials are known for in this application:
- Heat and moisture resistant, suitable for use in the kitchen
- Removable without leaving residue, without damaging the subfloor, ideal for rental apartments
- Precise color reproduction for individual motifs, wood effects, or concrete designs
- Compatible with professional large-format printers for precise cuts
- PVC-free options from our self-adhesive film without PVC
If you are unsure which material is best suited for your kitchen fronts, or if you would like to realize a custom design, we are happy to help. Simply Contact, and we will advise you concretely on your project.